
An inbox connects one of your channels, such as a WhatsApp number, a Facebook page, an Instagram account, or an email address, to the team that handles its conversations. Each inbox controls how new conversations on that channel are greeted, assigned, and optionally handled by AI.
- Before creating an inbox:
- Connect the channel first from the Channels page.
- Create at least one team from the Teams page. Every inbox must have at least one team.
- If you want to send automatic replies outside working hours, create a schedule from the Business Hours page.
- View your inboxes:
- Click Inboxes from the sidebar menu.
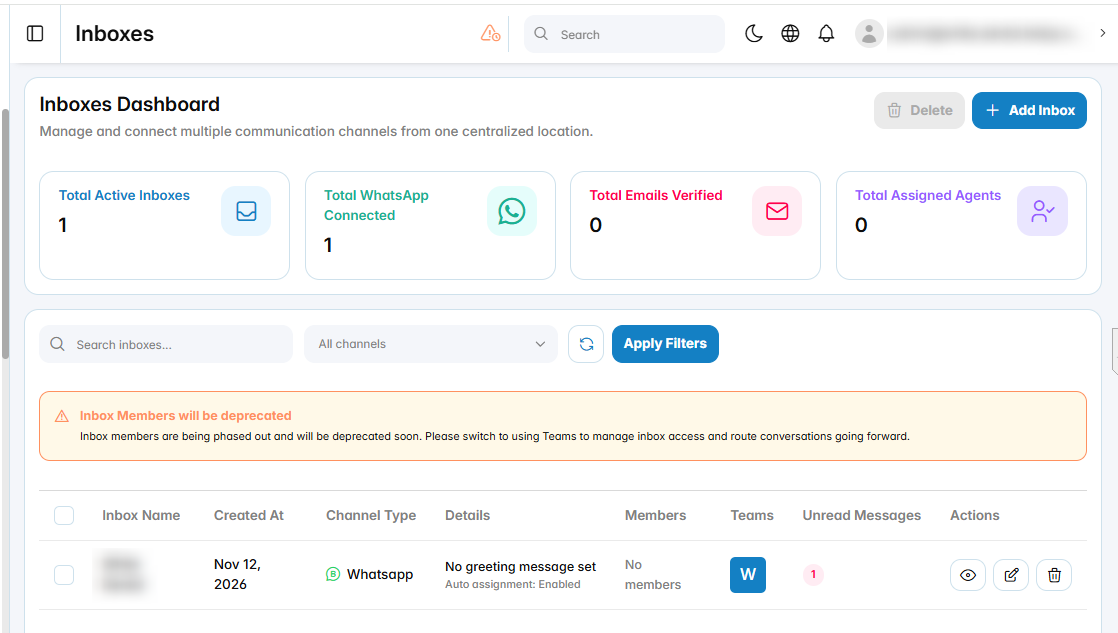
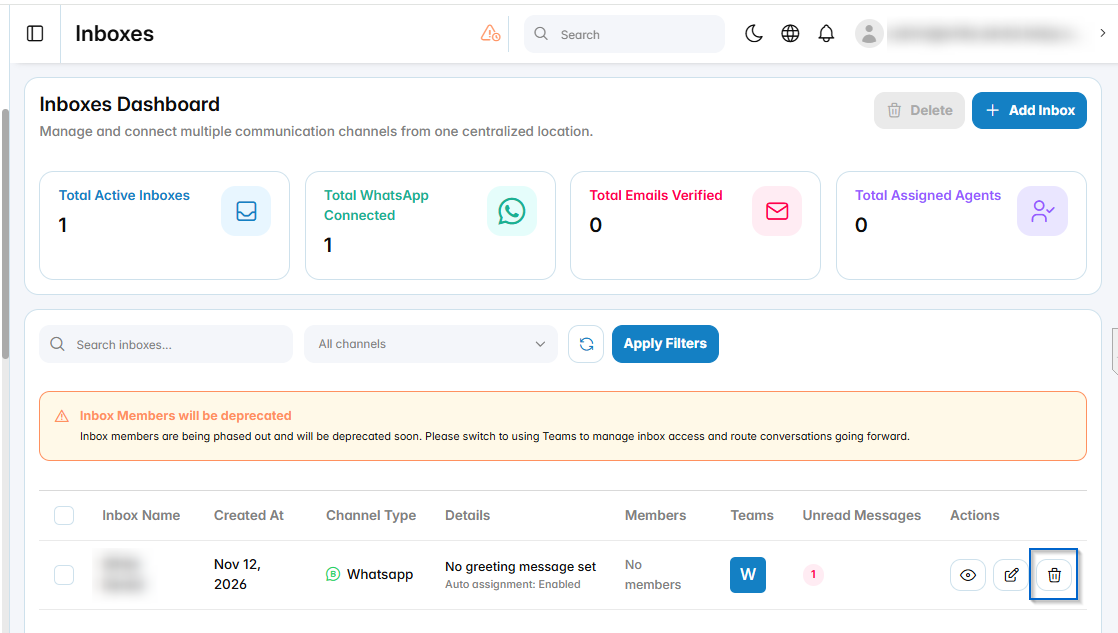
- The cards at the top show the total active inboxes, connected WhatsApp inboxes, verified email inboxes, and assigned agents.
- Use the search box and the channel filter to find an inbox, then click Apply Filters.
- The table shows each inbox’s name, creation date, channel type, greeting and auto assignment status, members, teams, and number of unread messages.
- Use the icons in the Actions column to view, edit, or delete an inbox.
- Create a new inbox:
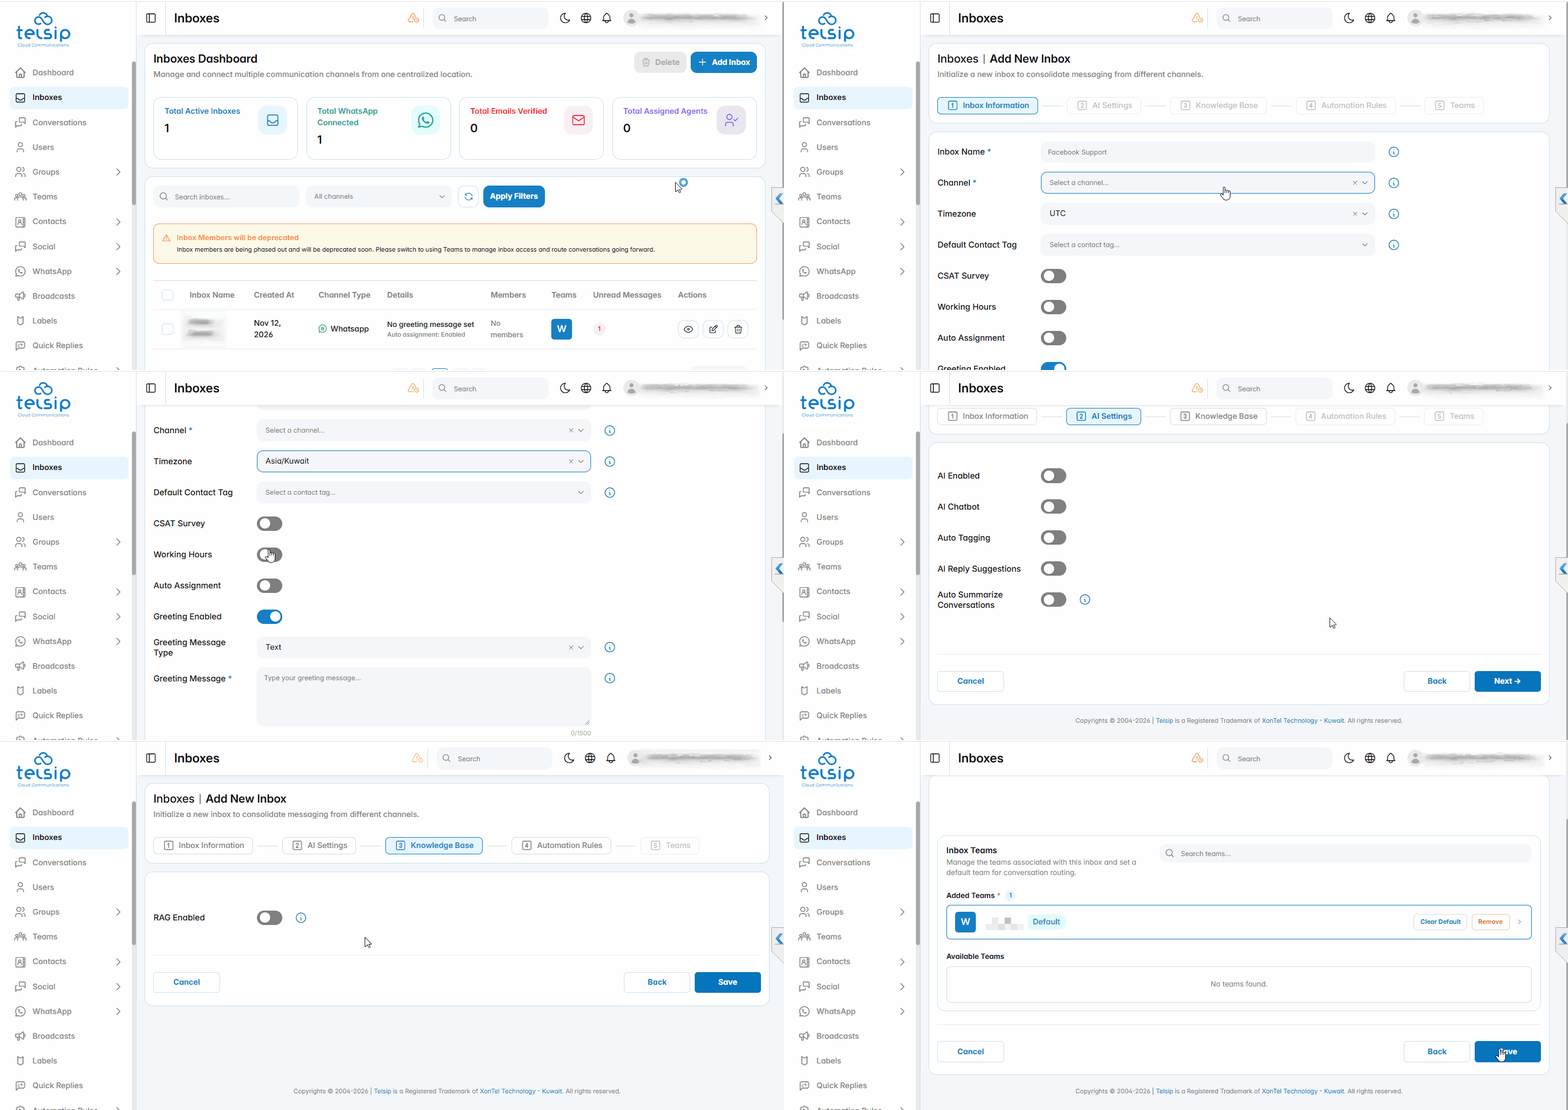
- Click Add Inbox. Creating an inbox has five steps. Fill in each step, then click Next to move to the following one.
- Step 1: Inbox Information
- Inbox Name: a name for the inbox, for example “Technical Support”.
- Channel: the channel this inbox receives conversations from. You cannot change the channel after the inbox is created.
- Event Types: appears for Facebook and Instagram channels only. Choose whether the inbox receives Messages, Comments, or both.
- Timezone: the inbox timezone used for working hours and reports.
- Default Contact Tag: a tag added automatically to new contacts created from this inbox. Tags are managed from the Tags page.
- CSAT Survey: sends a customer satisfaction survey when a conversation is closed.
- Working Hours: turn it on, then select a Business Hours schedule. Outside these hours, customers receive the Out of Office message.
- Auto Assignment: assigns new conversations automatically to available agents.
- Greeting Enabled: sends a greeting message when a new conversation starts. Choose the Greeting Message Type (Text, Template, or Media), then add the message. When you choose Template, only WhatsApp templates with no variables or one variable are shown.
- Out of Office Message Type and Out of Office Message: the reply sent outside working hours, as Text, Template, or Media.
- Step 2: AI Settings
- AI Enabled: turns on AI features for this inbox and shows the settings below.
- AI Chatbot: lets AI reply to customers automatically.
- AI Provider and AI Model: the AI service and model used by this inbox.
- AI System Prompt: instructions that tell the AI how to behave, for example “You are a support assistant for our company. Reply politely and briefly.”
- Auto Tagging: lets AI tag conversations automatically.
- AI Reply Suggestions: suggests replies to agents while they chat with customers.
- Auto Summarize Conversations: generates an AI summary of the conversation after a set number of messages.
- Step 3: Knowledge Base
- RAG Enabled: lets AI answer using the documents in your Knowledge Base.
- Knowledge Base: select one or more knowledge bases for the AI to search.
- RAG Top K: how many matching parts of your documents the AI uses to answer.
- Similarity Threshold: how closely a document must match the customer’s question to be used.
- Include Citations: shows the source document in the AI reply.
- Step 4: Automation Rules
- Automation Enabled: sends conversation events from this inbox to an external system, such as your CRM or a workflow tool.
- Automation Webhook URL: the link that receives the events.
- Automation API Key and Automation HMAC Secret: used to secure the connection with the external system.
- Automation Timeout: how long the platform waits for a response from the external system.
- Automation Triggers: the events that are sent to the external system. You can select one or more of the following:
- On New Message: when a new message is received.
- On Conversation Assigned: when a conversation is assigned to an agent.
- On Conversation Closed: when a conversation is closed.
- On Conversation Reopened: when a closed conversation is opened again.
- Automation Reply Wins: gives priority to the reply sent by the external system.
📌 Note: This step is different from the Automation Rules page in the sidebar menu. This step sends events from this inbox to an external system, while the Automation Rules page is used to build automated actions inside the platform.
- Step 5: Teams
- You can add more than one team to the same inbox. New conversations go to the default team, and can then be reassigned to any other team added to the inbox.
- From Available Teams, click Add next to each team that should handle this inbox’s conversations.
- Click Set Default next to the team that receives new conversations by default.
- To remove a team from the inbox, click Remove.
- Click Save to create the inbox.
- View inbox details:
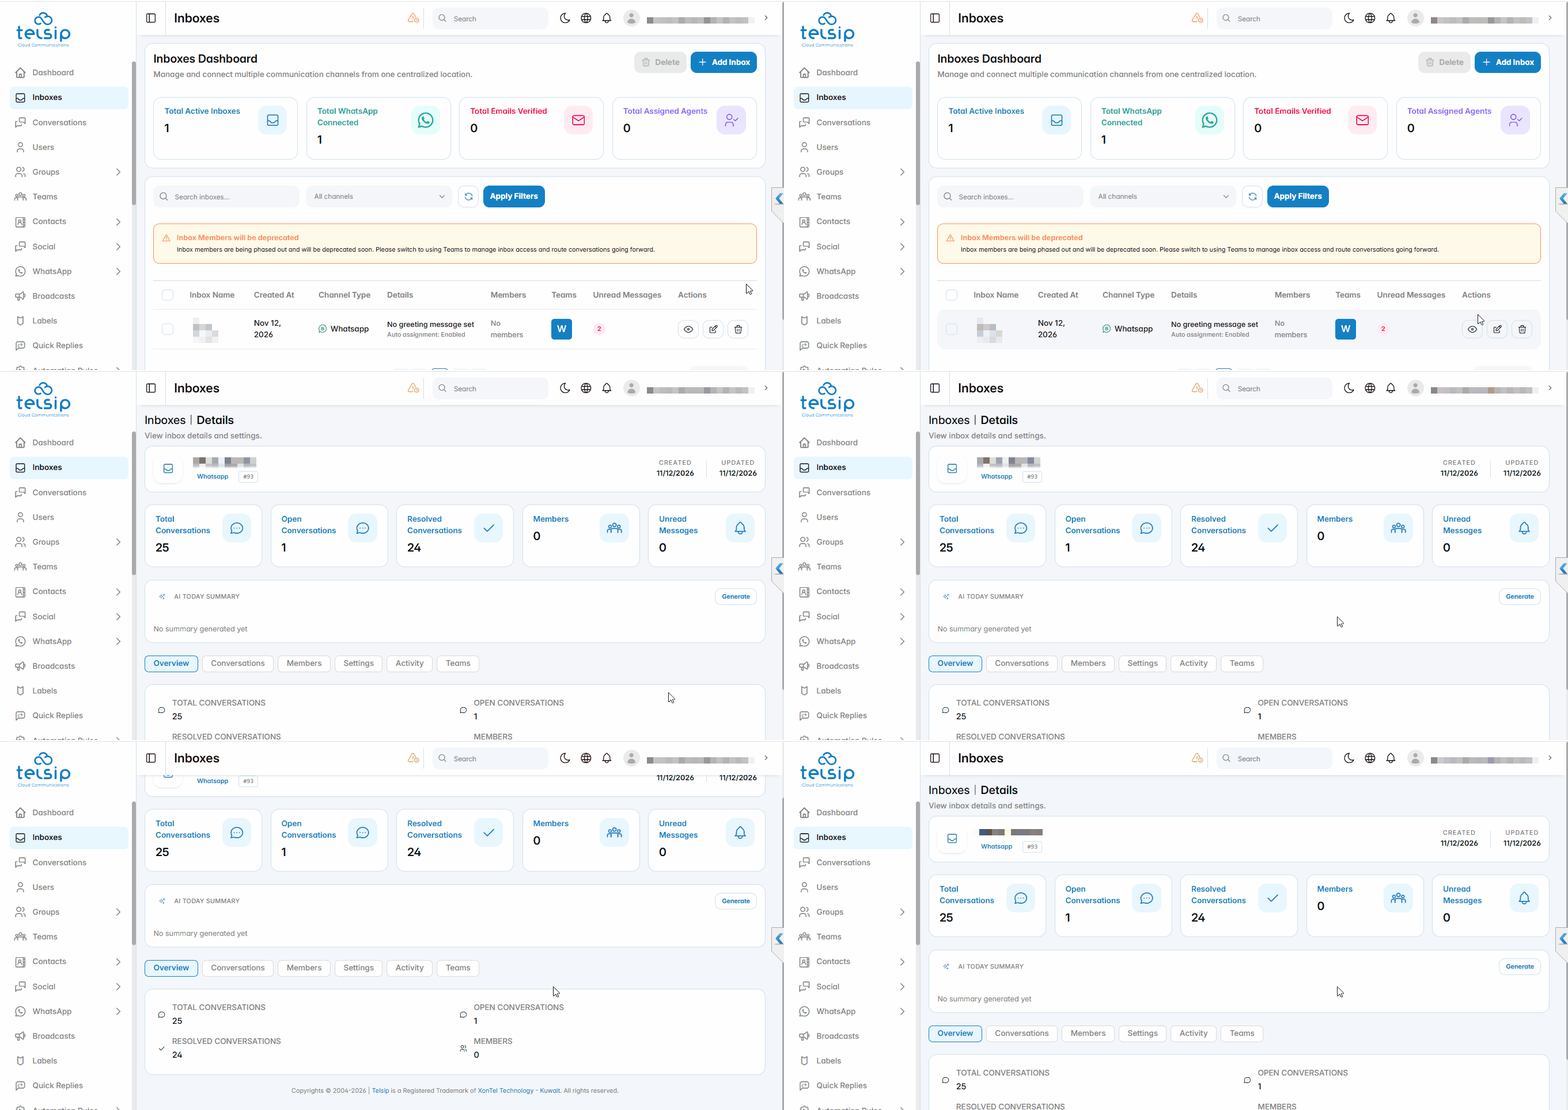
- Click the eye icon next to an inbox.
- The top of the page shows the total, open, and resolved conversations, the number of members, and unread messages.
- AI Today Summary shows an AI summary of today’s conversations. Click Regenerate to update it.
- Use the tabs to view more details:
- Overview: the inbox statistics.
- Conversations: all conversations received through this inbox, with their status and assigned agent.
- Members: users who have direct access to the inbox.
- Settings: a summary of the inbox settings.
- Activity: a history of changes made to the inbox.
- Teams: the teams assigned to the inbox and the default team.
- Edit an inbox:
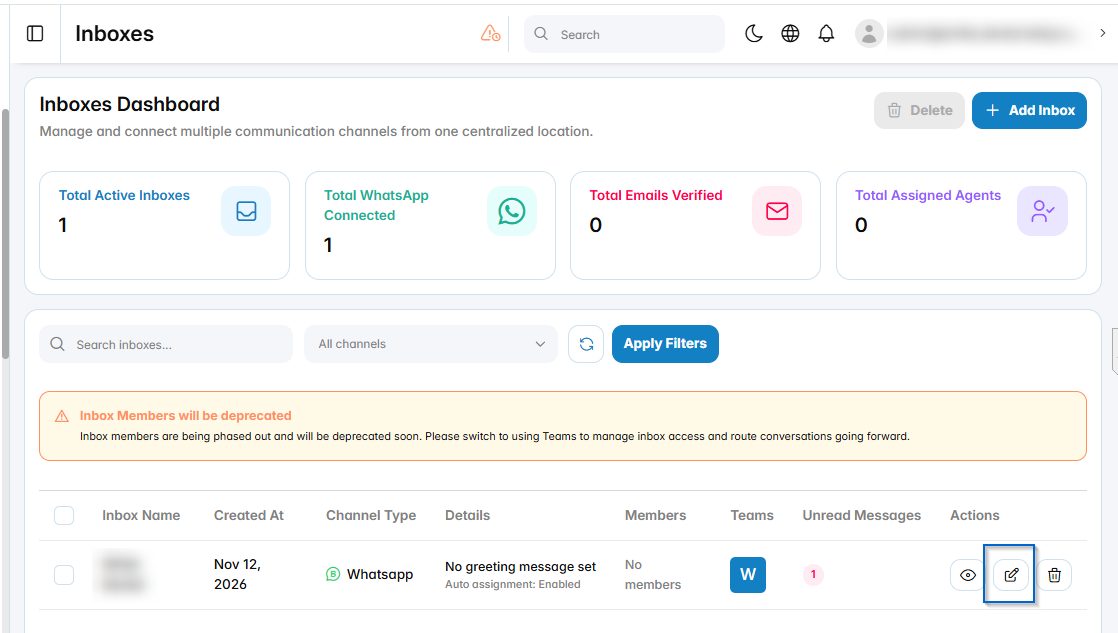
- Click the edit icon next to the inbox.
- Move between the steps by clicking their names, then update the settings you need.
- Click Save to apply your changes, or Reset to undo them.
- Delete an inbox:
- Click the delete icon next to the inbox, then confirm.
- To delete several inboxes at once, select them using the checkboxes, then click Delete at the top of the page.
📌 Notes:
- Inbox Members are being replaced by Teams. To control who can access an inbox and receive its conversations, use Teams instead of adding members directly.
- A channel’s settings, such as its phone number or account, are managed from the Channels page, not from the inbox.