
The Contacts page holds every customer your organization talks to. A contact is created automatically when a new customer messages you on any channel, and you can also add contacts manually or import them from a file.
- View contacts:
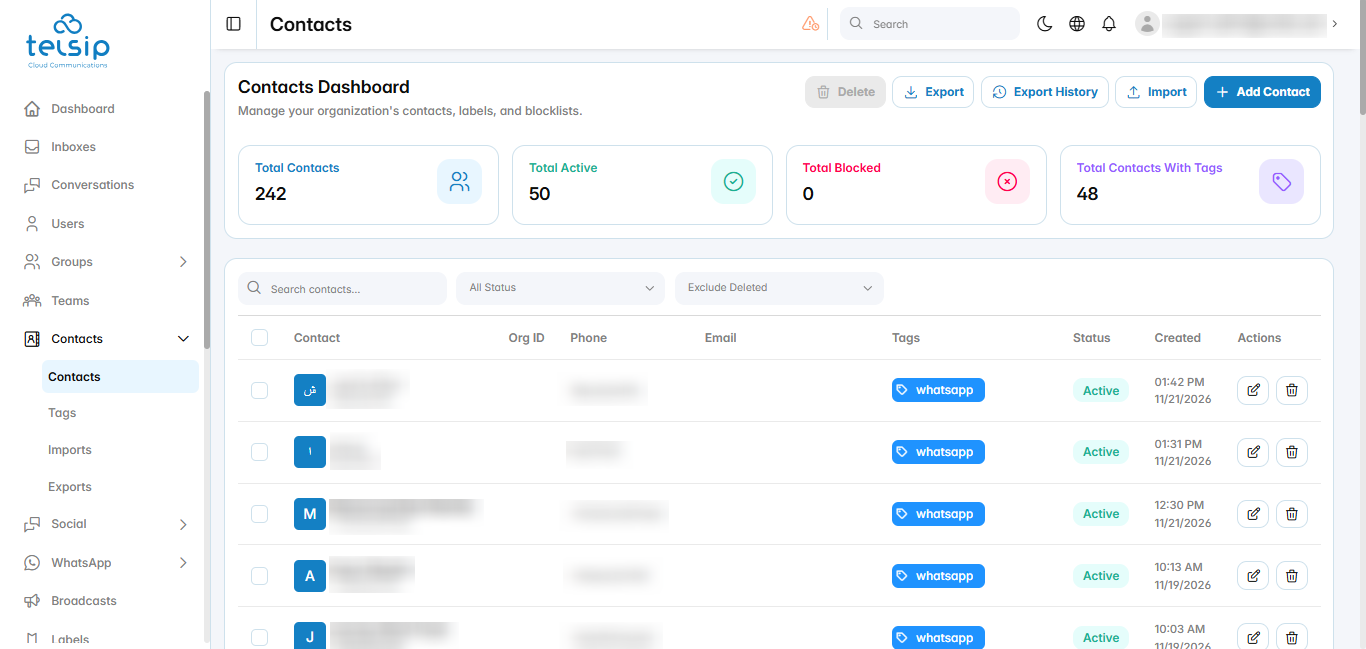
- Click Contacts from the sidebar menu, then click Contacts.
- The cards at the top show the total number of contacts, active contacts, blocked contacts, and contacts that have tags.
- Search for a contact by name or phone number, or filter the list:
- Status: All Status, Active, or Blocked.
- Deleted contacts: Exclude Deleted to hide deleted contacts, Deleted Only to show only deleted contacts, or All (Incl. Deleted) to show both.
- The table shows each contact’s name, Org ID, phone number, email, tags, status, and creation date.
- Click a contact’s name to open their profile, or use the icons in the Actions column to edit or delete the contact.
- Add a contact:
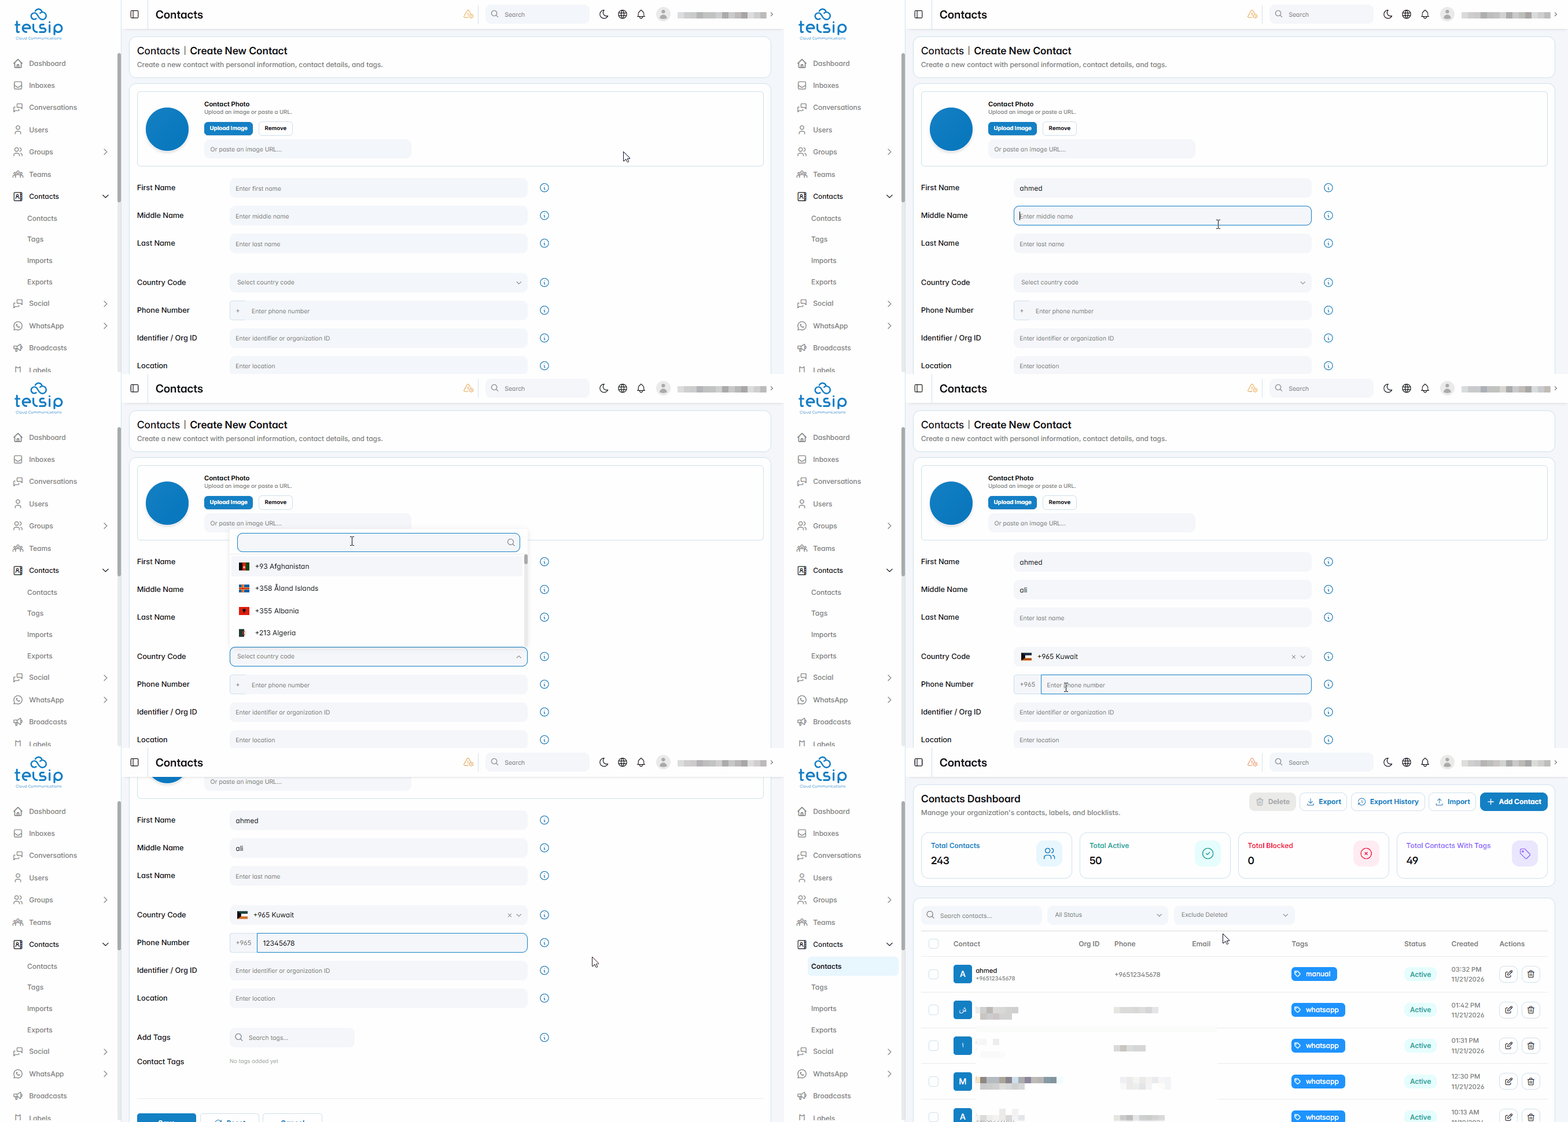
- Click Add Contact.
- Contact Photo: click Upload Image, or paste a link to an image.
- Enter the contact’s First Name, Middle Name, and Last Name.
- Select the Country Code, then enter the Phone Number.
- Identifier / Org ID: an optional ID, such as the customer’s ID in your own system.
- Location: the contact’s city or country.
- Add Tags: search for a tag and add it to the contact. Tags are managed from the Tags page.
- Click Save to create the contact.
- View a contact’s profile:
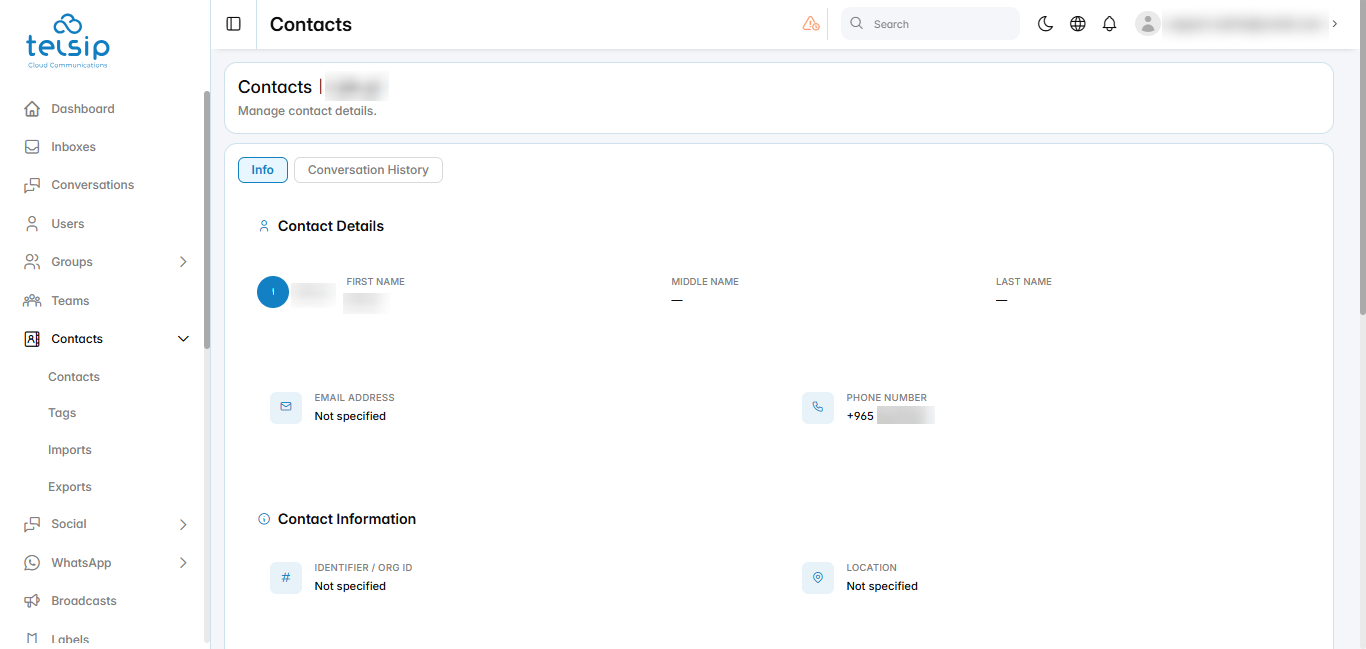
- Click the contact’s name in the list.
- Info: shows the contact’s details, contact information, creation and last update dates, and tags.
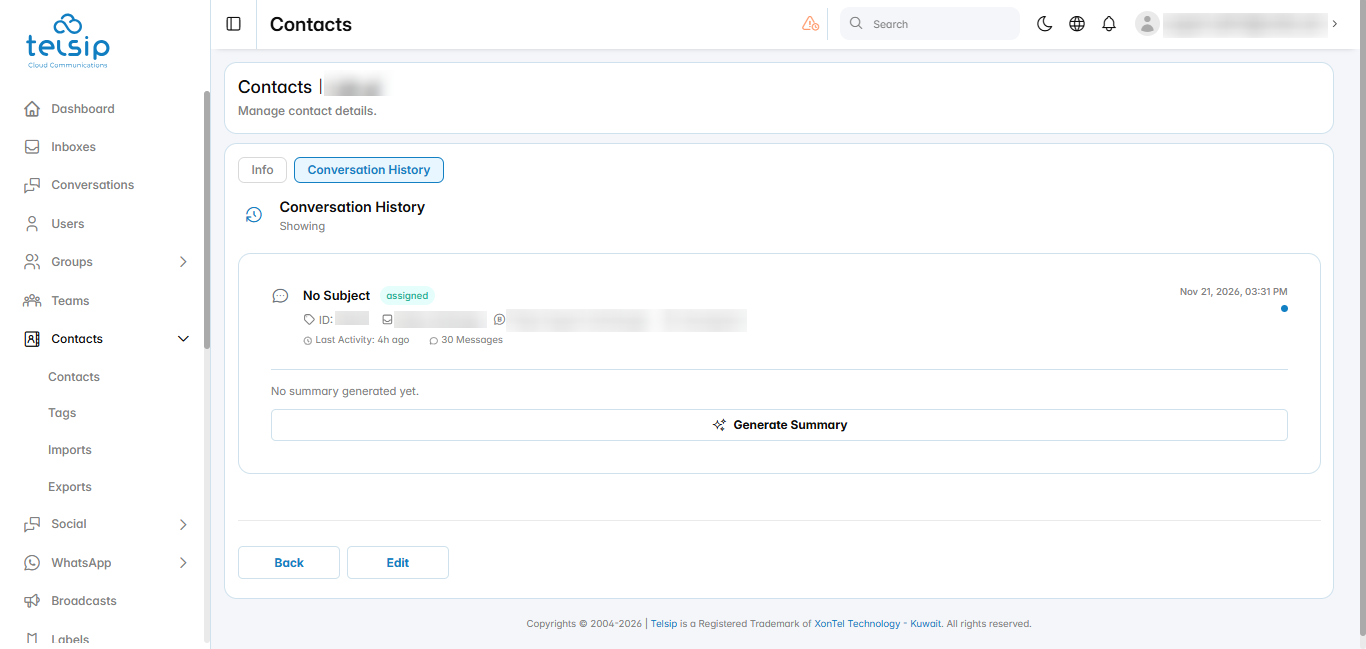
- Conversation History: shows all the contact’s conversations, with their status, inbox, channel, last activity, and number of messages. Click a conversation to open it, or click Generate Summary to create an AI summary of the conversation.
- Click Edit to change the contact, or Back to return to the list.
- Edit a contact:
- Click the edit icon next to the contact, or click Edit from their profile.
- Update the contact’s details. When editing, you can also add the contact’s Email Address and a Bio.
- Click Save to apply your changes, or Reset to undo them.
- Delete a contact:
- Click the delete icon next to the contact, then click Delete to confirm.
- To delete several contacts at once, select them using the checkboxes, then click Delete at the top of the page.
- To view deleted contacts, choose Deleted Only from the filter.
- Import contacts:
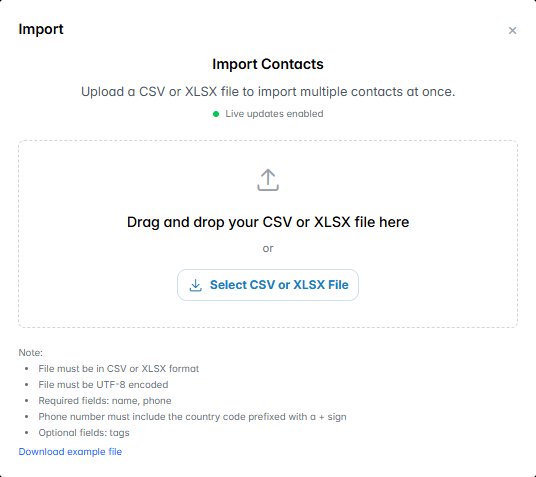
- Prepare a CSV or XLSX file with the following columns:
- name: the contact’s name. Required.
- phone: the contact’s phone number, starting with + and the country code, for example +96550123456. Required.
- tags: the tag to add to the contact, for example vip. Optional.
- Save the file in UTF-8 encoding.
- Click Import. To start from a ready template, click Download example file.
- Drag and drop your file into the upload area, or click Select CSV or XLSX File.
- To check the progress and results of your imports, see Imports.
- Prepare a CSV or XLSX file with the following columns:
- Export contacts:
- Choose any filters you need, then click Export. The export includes only the contacts that match your filters.
- The file is prepared in the background. Click Export History to open the Exports page and download it when it is ready.
📌 Note: Tags are added to contacts, while labels are added to conversations. To organize conversations, see Labels.