
A group gives the same set of permissions to several users at once. Instead of setting permissions for each user separately, you add users to a group, and they get all the permissions of that group.
Your organization starts with four system groups: Admins, Agents, Customers, and Supervisors. You can also create your own groups, for example a group for team leaders who need access to reports.
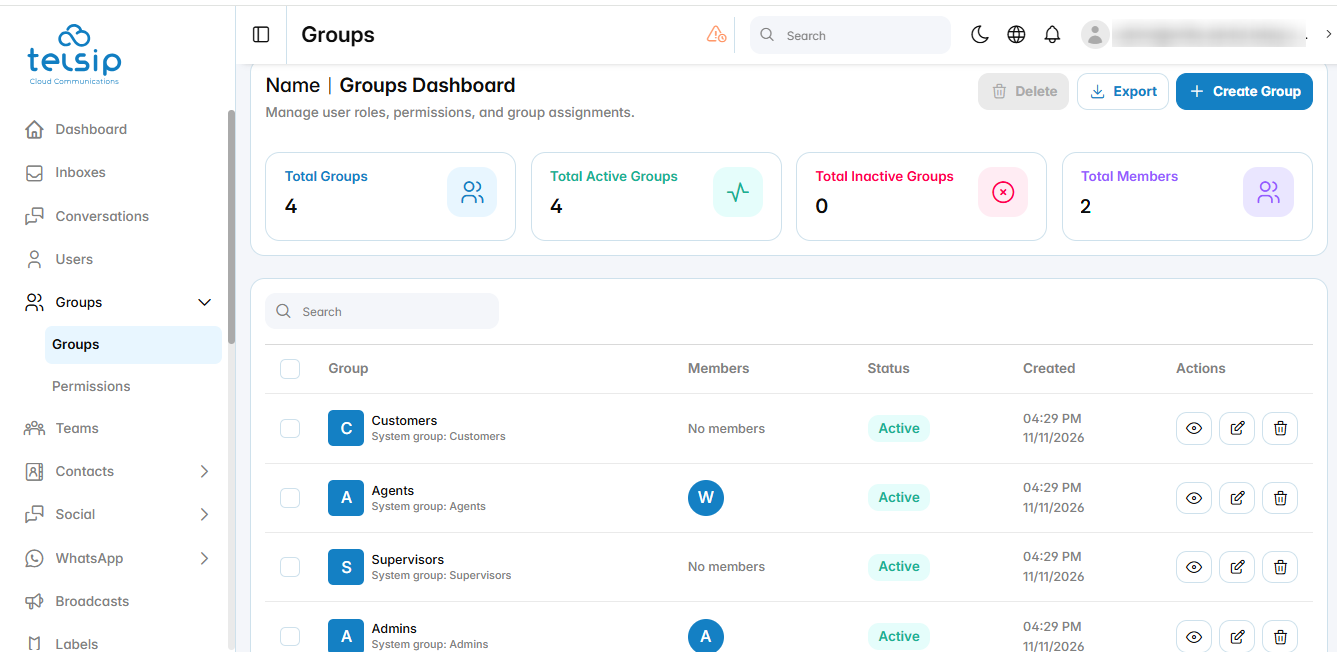
- View groups:
- Click Groups from the sidebar menu, then click Groups.
- The cards at the top show the total number of groups, active groups, inactive groups, and members.
- The table shows each group’s name and description, members, status, and creation date.
- Use the icons in the Actions column to view, edit, or delete a group.
- Click Export to download the list of groups.
- Create a new group:
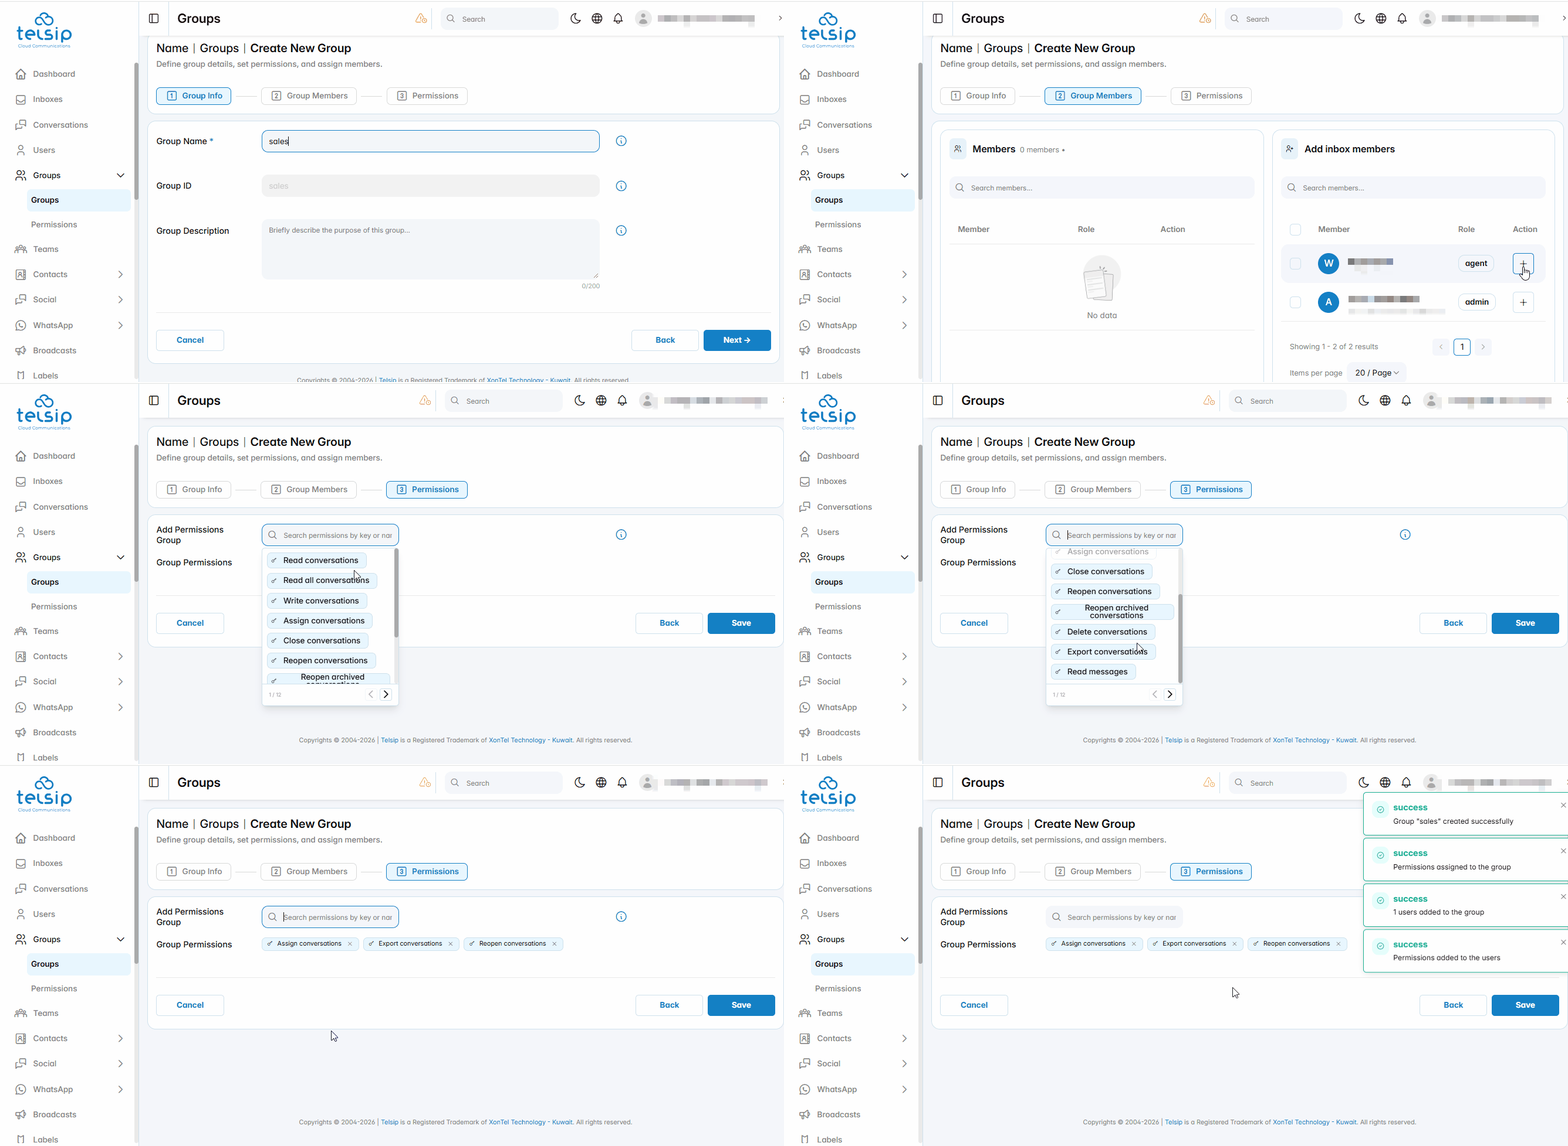
- Click Create Group. Creating a group has three steps. Fill in each step, then click Next to move to the following one.
- Group Info: enter the Group Name and an optional Group Description of up to 200 characters. The Group ID is created automatically from the group name.
- Group Members: search for a user in the list of available users, then click the plus icon next to the user to add them to the group. To remove a user from the group, click the delete icon next to their name in the Members list.
- Permissions: type in the search box to find a permission by key or name, then select the permissions you want from the list. The selected permissions appear under Group Permissions. To learn what each permission does, see Permissions.
- Click Save to create the group.
- View group details:
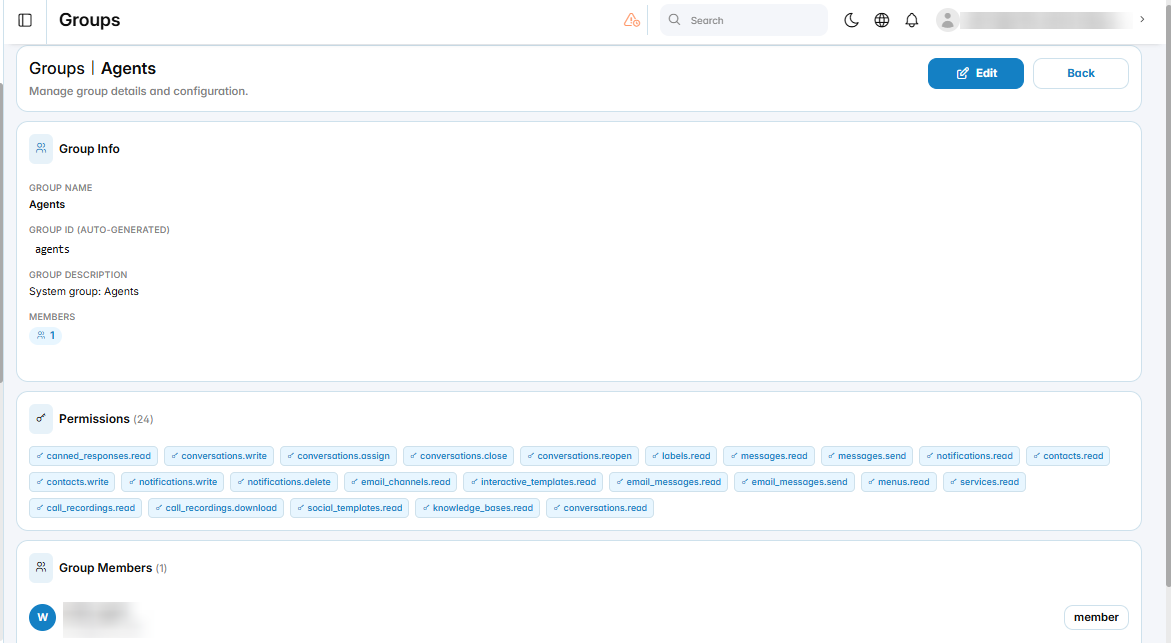
- Click the eye icon next to a group.
- The page shows the group name, ID, description, number of members, and the full list of permissions in the group.
- Click Edit to change the group, or Back to return to the list.
- Edit a group:
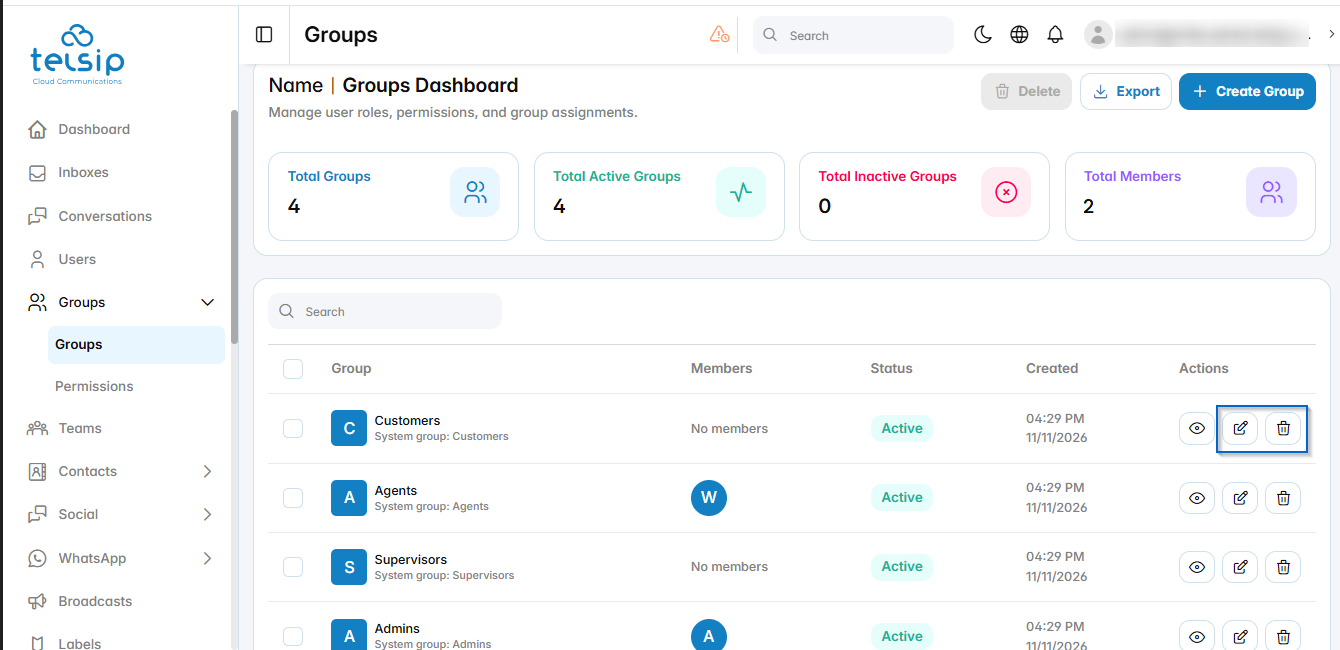
- Click the edit icon next to the group, or click Edit from the group details page.
- Move between Group Info, Group Members, and Permissions, and update what you need.
- Click Save to apply your changes, or Reset to undo them.
- Delete a group:
- Click the delete icon next to the group.
- To delete several groups at once, select them using the checkboxes, then click Delete at the top of the page.
📌 Note: Groups control what users can see and do in the platform. To control which conversations users receive, use Teams.